Cloud Client Installation Guide
The Cloud Client is our client-side application that allows users' machines to connect to The Cloud and run Cloud Applications.
To install Wavefire Connect you will need:
- The Cloud Client installer: Cloud Client Setup.exe
- Your Vendor ID which will have been given to you by your service provider
Internet Connection
The Cloud Client relys on an internet connection to connect to the cloud. The following are the recommended and minimum connection specifications for a single user:
Recommended
- Speed: >8 megabit/second
- Latency: <70ms
Minimum
- Speed: >2 megabit/second
- Latency: <300ms
Note
Where more than one user will be sharing the same internet connection, the connection speed will need to be increased appropriately and according to expected usage patterns.
Step 1
Run Cloud Client Setup.exe. This will start the installation process.

Click Next to continue.
Step 2
Please read and agree to the Licence Agreement by placing a tick against I Agree
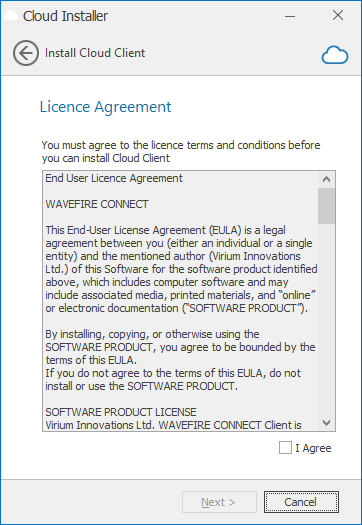
Click Next to continue.
Step 3
You will be prompted to enter your Vendor ID - this should have been given to you by your service provider and consists of 2 letters followed by 6 numbers.
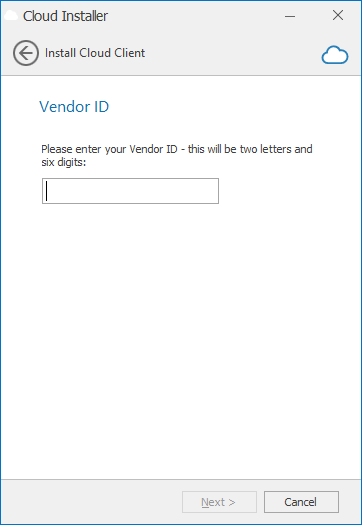
Once you have entered your Vendor ID, click Next to continue.
Step 4
The installer will verify the Vendor ID and download the configuration for your Cloud connection over the Internet.
Once this has been completed, the installer will be ready to perform the installation.
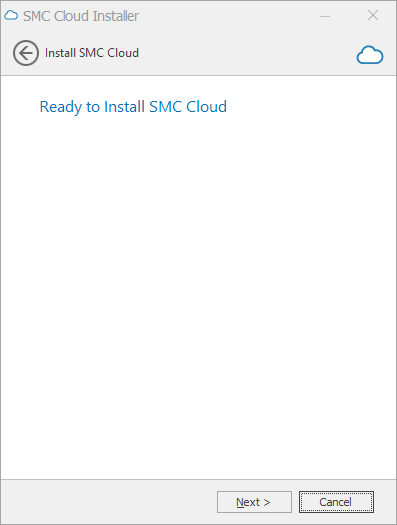
Click Next to install the Cloud Client.
Starting the Cloud Client
The installer will have placed an Icon on your Desktop branded as your service provider - Double click this icon to start the Cloud Client.